
The Ultimate Guide to Hanging Nursery Art
Hanging art in a nursery is one of the simplest, and most transformative, ways to elevate the entire room. But when it comes to choosing the right size, figuring out proportions above a crib, safety considerations, or styling a sweet little gallery wall, the details can start to feel surprisingly intimidating. The truth is, a beautifully balanced nursery wall isn’t about guesswork or “eyeballing it.” It’s about a few thoughtful guidelines that make the whole process feel clear, approachable, and even fun.
In this guide, I’ll walk you through all the essentials: how large your art should be in relation to the crib, the ideal height for hanging it, how to space multiple pieces so they feel cohesive, and the safest materials and installation to choose for baby’s room. Whether you’re leaning toward one striking statement piece or a curated set of prints, these simple designer tricks will help you create a polished, proportionate look that feels effortless and truly intentional.
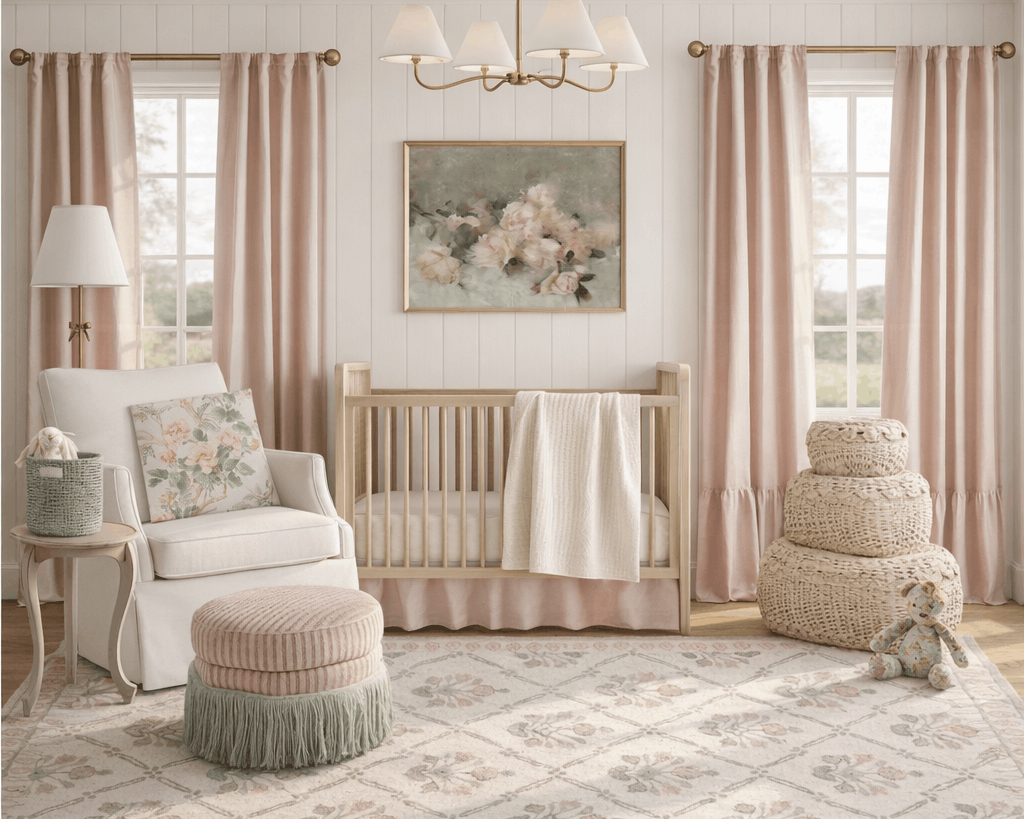
Client rendering
1. Start With the Right Size: Think in Proportion, Not Guesswork
If you’ve ever found yourself holding a frame against the wall and second-guessing every inch, you’re in good company. Thankfully, you don’t need perfect instincts to get the proportions right. A simple guideline does the heavy lifting for you: the two-thirds to three-quarters rule.
When hanging art above furniture, including cribs and dressers, the artwork should span at least half the width of the piece below it and ideally land closer to two-thirds or three-quarters. For most cribs (which are around 54 inches wide) you’ll want art or an art grouping that measures roughly 36-40 inches across. For a dresser that is 60 inches wide, you’ll want your mirror or art (or grouping of both) to be approximately 40-45 inches wide. This keeps everything feeling balanced, intentional, and visually connected.
Examples that work beautifully above a crib:
One large horizontal piece (something like 24" x 36")
Two medium pieces, such as 16" x 20" frames, hung side-by-side
A set of three smaller pieces arranged in a neat row
A collage style gallery wall, spaced evenly
2. Choose a Layout: Single Statement vs. Grouping
Choosing between a single statement piece and a thoughtful grouping comes down to the mood you want the nursery wall to convey. Both can be equally beautiful when they’re scaled well and treated as one intentional composition, so it’s simply a matter of deciding whether you prefer one strong focal point or a collected, layered look. Both can work beautifully, what matters is treating the layout as one unit.
If you are hanging a single piece above a piece of furniture:
Choose a size that truly anchors the crib or dresser visually. (See the proportion guidelines above.) If your crib wall has wallpaper, look for artwork with a generous mat to create some breathing room between the pattern and the print, or choose a piece with a softer, more abstract feel to balance the detail of the wallpaper.
If you are creating a grouping above a piece of furniture:
Space each frame about two inches apart. This tighter spacing helps the arrangement read as one cohesive block rather than a scattering of individual pieces. Keep the overall width of the grouping within the same two-thirds to three-quarters rule so it feels well-proportioned above the piece of furniture. Groupings work especially well when you want to showcase a collection of smaller themes such as animals, botanicals, or childhood quotes, or when you want to mix personal photos with illustrations for a collected, heirloom-inspired look.
If you are hanging art on a blank wall without furniture beneath:
Center it on the available wall space (such as between a curtain panel and the corner of the wall or between two door moldings) and select proportionately sized art to the size of your wall.
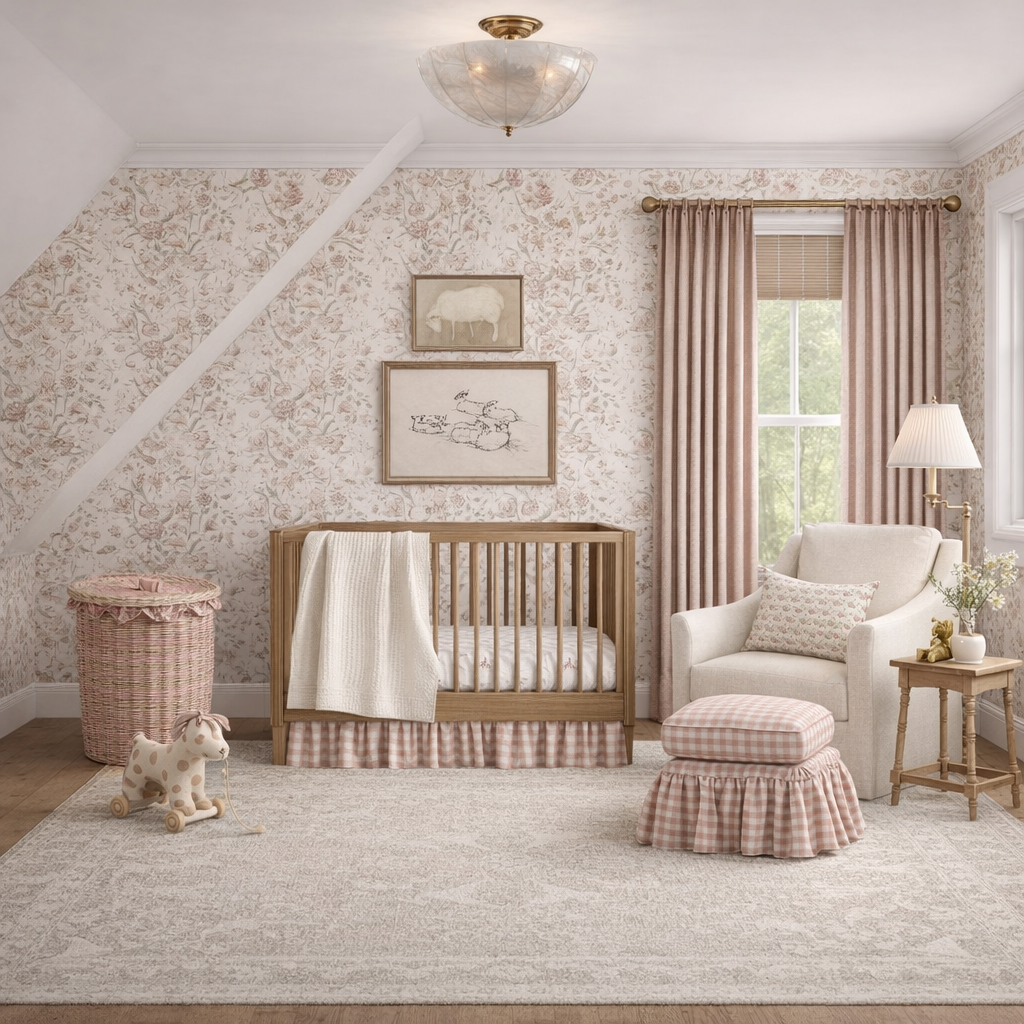
Client rendering
3. Hang It at the Right Height
Proper placement is one of the most important parts of creating a balanced, intentional look in your nursery or child’s room. The most common mistake is hanging artwork too high, which leaves the wall feeling visually disconnected from the furniture below it. The goal is for the art work to feel visually anchored to the furniture beneath it, creating a balanced, intentional moment within the overall space.
For art above a crib (or dresser):
Position the bottom of the frame 8 to 10 inches above the furniture. This height keeps the artwork visually anchored to the crib while still providing enough breathing room for bedding, movement, and everyday use of the space.
If you are installing a grouping of multiple frames above the crib:
Treat the arrangement as a single unit. The bottom of the lowest frame in the set should follow the same 8 to 10 inch guideline to maintain proper proportion and cohesion.
If you are hanging artwork on a wall without a large furniture piece beneath it:
Use the artwork itself as the anchor. A reliable guideline is to position the center of the piece at roughly 60 to 66 inches from the floor. This height feels natural for most people as they move through a space and keeps the artwork grounded rather than floating too high on the wall. If you are working with a grouping, think of the entire arrangement as one unified piece and place the visual center of the grouping within that same 60 to 66 inch range. This simple adjustment creates a sense of balance, intention, and flow throughout your home.

Client rendering
4. Safety First: Baby-Proofing Your Wall Art (Without Sacrificing Style)
You can have beautiful art and peace of mind by considering the materials in the art above your baby’s crib. For instance, I recommend not hanging art with glass fronts above a crib whenever possible (and never hang a mirror above a crib). Instead of real glass, look for:
Acrylic (plexiglass) front art
Wrapped canvas art
Printed fabric/canvas sign
Vintage map
Beautiful quilt
Small name sign
If your dream frame is only available with real glass? You can simply remove the glass before hanging (this can make a piece look even more high-end, in my opinion) or replace it with an acrylic sheet - easy swap, minimal cost.
When installing your art work, you will want to use secure hanging hardware and adhere to the wall at multiple points. The best practices for installing art securely above a crib (or dresser/changing table) is to secure it at the top in multiple locations with appropriate hardware (such as French cleats or D-rings) and secure at the bottom two corners with earthquake putty, Velcro or command strips. Ensure the hardware is rated for well beyond' the frame’s weight.
5. Consider Style, Personality, and Longevity
Selecting the right art involves more than just proportions and spacing, it’s an opportunity to bring a meaningful narrative to the nursery wall. Consider elements such as color palettes that complement your textiles or wallpaper, timeless themes like botanicals, classic animals, travel, sports or soft landscapes, and textures including linen mats, canvas, or wood and aged brass frames. Incorporating even a single sentimental piece can add a personal, thoughtful touch. You don’t need to over-theme the room; a few well-chosen, intentional pieces are all it takes to create a cohesive and inviting space.

Client rendering
6. Quick Visual Cheat Sheet
Art width (single piece or grouping): 2/3 to 3/4 the width of the crib (or dresser) beneath
Frame spacing in groupings: 2 inches apart
Height above furniture: 8–10 inches to the bottom of the lowest frame
Safe materials: plexi-glass or no glass, canvas or fabric
Hardware: secured with two anchors (or french cleat) plus stabilizing putty or velcro
I hope this guide helps you feel more confident and inspired as you create a nursery that is both beautiful and thoughtfully designed for your little one. Designing a nursery is such a meaningful step in welcoming your baby, and I want you to feel supported and encouraged throughout the process.
If you’re looking for personalized guidance, my custom virtual design packages offer just that. I carefully curate every art piece specifically for your nursery and provide detailed recommendations on exactly where and how to hang them, ensuring the wall art not only looks stunning but also feels perfectly balanced and connected to the space. Together, we’ll create a cohesive, calming room tailored to your style and your baby’s needs - making the entire design process smooth, enjoyable, and truly stress-free.